Monday 23 July 2012

PEANUT BUTTER BROWNIE

the first daffodil, maybe spring isn't too far away!


This post is for Emmaline

Continuing on with the chocolate theme, we have this peanut butter brownie which has become a very firm favourite with my offspring and their friends.  My friends also but we can't eat as much as the 'kids' without the  impact being felt on our waistlines and other various parts of the body.


As with so many of my recipes, this starts out from a Women's Weekly cookbook, this one titled 'Biscuits, Brownies and BIscotti' .  It's a great little book, with the page for these brownies well decorated with splodges of chocolate.  From the moment I first baked it there were constant requests for it from all directions.


Is there anything more decadent than the mix of  chocolate, butter, peanut butter and more chocolate?  Possibly, but it comes pretty high on the list.  

The only changes I make to this recipe depend on the type of peanut butter I have in the cupboard, smooth or crunchy, or the swapping of the extra chocolate for white chocolate, depending again on the cupboard or my mood.

PEANUT BUTTER BROWNIES

*180 gms chopped butter
*150 gms dark chocolate- eating or cooking I've used both
*1 3/4 cups caster sugar- actually I often use brown sugar
*4 lightly beaten eggs
*1 teaspoon vanilla essence
*3/ 4 cup plain flour
*2 talbespoons self raising flour
*1/3 cup cocoa powder
*50 gms dark chocolate chopped
*1/3 cup crunchy peanut butter
* I have at times, added a handful of chopped unsalted peanuts as I like the crunch

*Heat oven to moderately slow
*grease a 20cm x 30cm pan, lining the base and ends with baking paper, extending the paper over the ends in order to use these to help lift the brownie out when cold
*melt butter and chocolate over low heart till mix is smooth, do not boil
*cool a little
*stir in sugar, eggs and essence till well incorporated
*continue stirring in sifted flours and cocoa
*pour half mixture into pan smoothing into corners
*drop teaspoonfuls of peanut butter and scatter with extra chocolate then gently swirl with a knife
*layer the remaining mixture over the top smoothing to the corners
*bake till firm, about 45-50 minutes, cool in pan


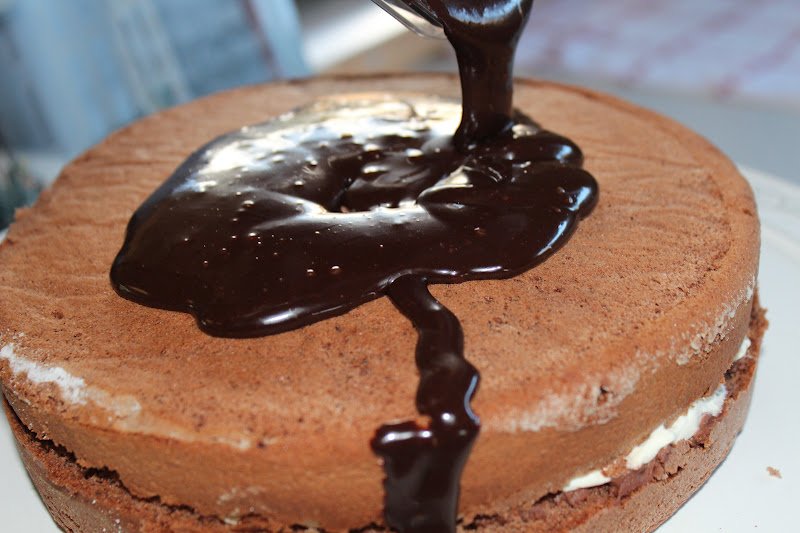
look at those luscious bits of chocolate


yummy chunks of peanut butter


This bold fellow was perched on the clothesline.  He stayed still, watching me whilst I took his photo from different angles, then flew off when he'd had enough.  Luckily I had enough photos as well.


Enjoy

Jo

Saturday 21 July 2012

CHOCOLATE SPONGE


It occurred to me recently that I had never really mastered the sponge cake.  Of course this was not the first time I had thought about it but due to the fact that my mum was a first rate sponge maker I suppose I had avoided it for fear of failing.

Silly and past time for me to conquer.  Some years back I had actually successfully followed recipes for sponge rolls, driven simply by the price of them in the bakery and my children's desire to eat them. 

So, back to those sponges which take pride of place at 'Ladies Afternoon Tea', church or indeed any sort of fete, and that grace the magazines when they have a segment on high tea's. 


After perusing my womens weekly 'Bake' cookbook, which kindly has a whole chapter devoted to the subject, including lots of do's and don'ts, I chose the chocolate sponge, purely because I had some coffee ganache in the freezer that I wanted to use up.  Not because it was past it's use by date, I was tidying up my fridge!


The eggs in traditional sponges are beaten for 10-15 minutes and the air that is incorporated during this process is what causes the sponges to rise to the desired heights.  The sugar is added slowly beating until all the grains aere dissolved requiring frequent scraping down of the sides of the bowl and beaters.  This mix is then transferred to a wide topped bowl


Flour, usually plain due to the air/egg/rising process, is triple sifted, the last time into the egg/sugar mix, and from a height in order to incorporate yet more air.


Folding this mix together correctly is crucial, best done with a metal spoon in a gentle yet sweeping move, making sure that there are no lumps of flour left.  Alternately, use your hand, opening your fingers wide so as to catch all the mixture, drag through and wipe your hands on the side of the bowl.

Any liquid is added last.  According to the WW team, if liquid with melted butter is too hot when added it will toughen the sponge. 

It always helps to have these little tips!!!!!!

CHOCOLATE SPONGE

*  3 eggs
*1/2 cup caster sugar
*1/4 cup cornflour
*1/4 cup plain flour
*1/4 cup self raising flour

FILLING
*300mls thickened cream whipped
*ganach of your choice or jam

ICING
*coffee flavoured ganache

OR
* chocolate icing
it is really up to you and depends on your filling

*preheat oven to 180 deg or 160 for fan forced
*grease and line a deep 22 cm round cake pan
*beat eggs in a small high sided bowl until thick and creamy
*slowly add sugar 1 tablespoon at a time beating well after each until sugar is dissovled
*transfer to a wide lipped bowl and gently sift in the flour that has already been sifted twice and then fold in with your preferred method
*spread mix into pan, placing any last scrapings around the edges of the pan as these tend to be heavier and could affect the rising if placed in the middle
*bake for 25 minutes - keep an eye on it as all ovens are different
*turn sponge onto a rack lined with baking paper to cool
*split in half, spread with filling of your choice, sandwich and ice


* I used walnuts on mine as they complement the coffee ganache but the sky is the limit really
* I also spread some coffe ganache on the bottom layer before spreading the whipped cream which also had a small amount of mascapone folded through.

Enjoy

Jo

Tuesday 3 July 2012

SEASONS


Autumn is my favourite season.  The crisp cold mornings, balmy days to spend in the garden tidying up after summer, preparing for winter, planting for spring. 

The colours of the leaves as they turn dazzling shades and then fade forming a crisp carpet just begging to be jumped on.             

 The liquid ambers provide such a wonderful display and one of which I never tire. 


The tibouchina trees that line each side of this street look like a necklace of exotic amethysts, sparkling in the sunshine.


In my garden I have cliveas which were planted a few years ago and have not  yet flowered.  Till just recently.  This was the first of the flowers and since then a large cluster has bloomed.  I hope it is the first of many.


The arum lillies have grown enormously and are higher than any I've had before.  They almost dwarf the magnolia tree they surround and soon I will have to dig and divide them, giving the magnolia more space to spread.


In saying that however, I do love them and they are blooming randomly at the moment which I find astonishing.  The may bushes have been throwing out the odd blossom as well so there must be something in the air.                                                                     

The Lilly pillies have lots of pinky, red shoots on them and I hope this spring they will spread out and up forming the hedge I had in mind when  I planted them.


I Look forward to the time when my magnolia tree is covered in buds like this one.   
    
Brazilian snapdragon
                
The cats were busy following me around whilst I wandered and photographed.  Not sure if they were going to pounce on each other or me.


Gorgeous Lillium from a vase of flowers, all the lillies were buds and opened one by one over a few days.

Sparkling winter morning

These photos were all taken over approximately six weeks.  The difference in the leaves at the top of this post to the ones below testimony to their gradual fading.


soon they will be gone completely and the branches will remain bare till the first shoots of green unfurl, heralding Spring.

Enjoy the cold

Jo